


Feature Image by Mălina Sîrbu
Oranges always make a beautiful touch to the holiday season. Whether you’re adding them to drinks, crafting or decorating, there are endless ways to get creative with them. We’ve put together a list of three easy DIY crafts with oranges for Christmas. You might have a couple at home or they’re easy enough to run out and grab with your last-minute holiday grabs.
Orange Peel Ornaments from This Healthy Table


Image from This Healthy Table Instagram @thishealthytable
How to Make Simple Orange Peel Ornaments
1. Peel an orange, by cutting off both ends and running a knife from end to end. Carefully pull the peel off, trying to keep it as intact as possible. Cut it into two to three pieces.
2. Using a small (1 inch) cookie cutter, cut out shapes from the peel.
3. With a metal pin or end of a knife, create holes in the top of each orange peel cutout.
4. Cut twine or ribbon and thread it through the holes in the cutouts. Tie it to complete the ornament!
Ways to Use these Ornaments
-
Hang them on the tree
-
Add them to a wrapped package. Tie them onto the bow or ribbon around a package for a cute and delicious smelling gift wrap.
-
Hang them on a garland. Hang an evergreen garland and hang the oranges along with it.
-
Hang them on a door handle. String several orange peel ornaments on one piece of twine and hang it on a handle.
-
Add them to a wreath. Orange peel ornaments look super cute in an evergreen or eucalyptus wreath.
Orange and Clove Pomander Balls from Almanac


Image from Almanac, view Instagram @theoldfarmersalmanac
How to Make Them:
-
Take firm oranges and stud them with whole cloves. That’s it!
-
You can also use a toothpick to make pre-made holes; this is helpful for children because the cloves can hurt their little hands (and ours).
-
Be creative and arrange the cloves in diamonds, circles, or other patterns. As the orange dries, it will release a delicate, spicy fragrance.
-
For a stronger aroma, cover the entire orange with cloves, and then roll it in a mixture of spices such as: 1 teaspoon ground cinnamon, 1 teaspoon ground cloves, 1 tablespoon ground nutmeg, 1 tablespoon allspice, 1/4 cup powdered orris root. Leave the orange in the mix for a week, turning once a day.
-
To hang your pomander, run a long wire through the orange; make a knot at the bottom and a loop at the top for hanging. Or, you can tie red ribbon around your pomander for a festive look!
How to Make It Last
If you want your pomanders to last, store in a paper bag for a few weeks. Use lots of cloves which are a natural preserving agent. The cloves will draw out the juices and they’ll shrink in size. Dusting with cinnamon helps, too, as cinnamon functions as an anti-fungal.
Ideas for Using Pomanders
-
Arrange the cloves in special shapes and patterns. For Halloween, make a jack-o’-lantern; for Thanksgiving, try a turkey; for Christmas, a Christmas tree!
-
Create a centerpiece for your next holiday meal.
-
Give to friends, teachers, and neighbors in a plastic bag with a red ribbon!
-
Try putting an orange pomander at the bottom of your Christmas stockings.
-
Use small oranges (or another small citrus) to create a fragrant ornament for the Christmas tree.
-
Once dried, hang pomanders in your closet or add to your drawers like a sachet.
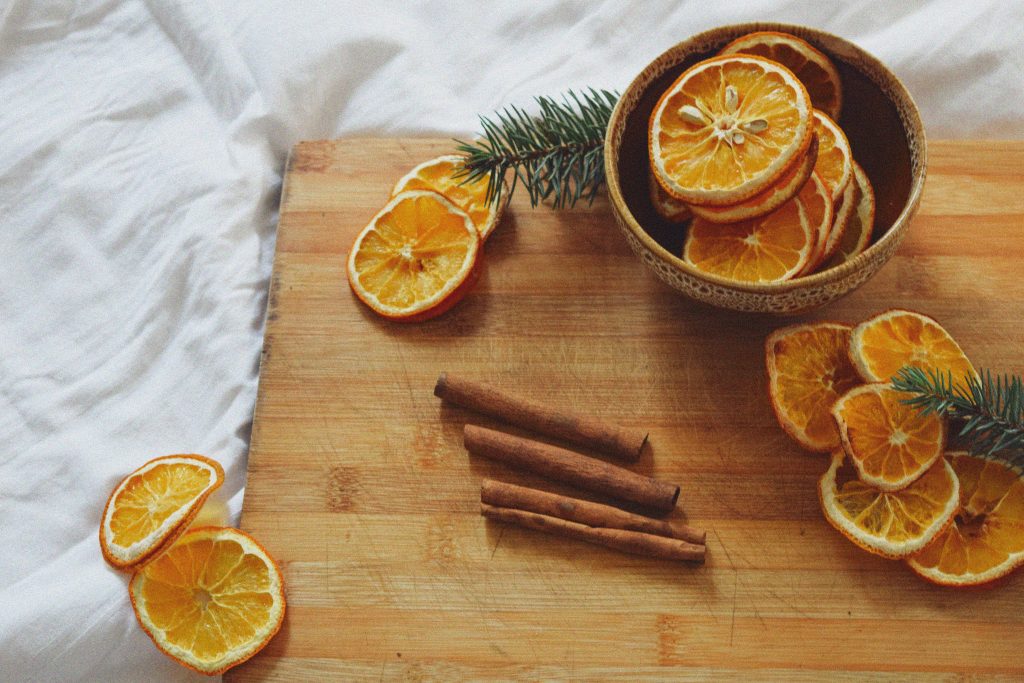
Dried Orange Garland from The Ginger Home

Image from The Ginger Home, view Instagram @thegingerhome
You will need:
- 4-5 large oranges
- Sharp knife
- Cutting board
- Cookie sheets
- Parchment paper
- Paper towel
- Fishing wire or twine
Step 1 – Turn on the Oven: Preheat the oven to 225º F. I like to use the convection setting on my oven as it moves the air around more and I find I don’t necessarily need to flip the orange slices, but this is optional!
Step 3 – Slice Oranges: Slice oranges 1/8 to 1/4 inch thick and place them in a single layer on the cookie sheets. Blot with a paper towel to remove excess moisture and speed up the drying process.
Step 4 – Bake Oranges: Place in the oven and bake for approximately 3 hours at 225ºF or until the oranges start to turn slightly brown and dry. You can flip the oranges about halfway through the baking process to help them brown evenly and dry on both sides.
Note: Not all ovens are the same and lots of readers have said that they’ve needed to set their oven to a lower setting to avoid burning the orange slices. You could start as low as 170ºF and see how it goes if your oven is on the hotter side!
Step 5 – Let Orange Slices Cool: Let the orange slices cool! They smell so good! I just let mine cool for a few hours right on the tray and then made my garlands. I figured they would just dry more hanging up. But if you wanted to, you could place them on a cooling rack and leave them out for a few days to make sure they were extra dry!
Step 6 – String Oranges & Decorate: String the oranges onto a clear fishing line. Poke the line through the flesh of the orange, not the rind! You can string them close together, or leave 1-2 inch gaps as I did for a more minimal look. The fishing line is invisible and makes the oranges look like they are floating! Use a string of oranges to trim a cedar or fir garland as I did above our kitchen sink!
Tag us @ageoflapin on any social platform to show us your crafts!