Tag Archive : oh she glows

When it comes to food, the more flavourful, the better and what makes it even tastier is when the flavour flav comes with benefits. Welcome to the power of spices. We’ve created a list of some must have spices you need in your pantry to help you grow and glow and some scrumptious recipes to go along with them. Whether you’re in the mood for salty or sweet, it’s never a bad idea to sprinkle in some self-love to keep your wellness journey moving along beautifully.

Here’s some of our favourite spices:


Cinnamon:

This one reminds us of all of the cozies and comes with some seriously impactful benefits. It contains anti-inflammatory heal plus antioxidants and antimicrobial properties to fight harmful agents, illnesses and diseases in the body.

Cinnamon Recipe:

Healthified Apple Crisp from Minimalist Baker

Healthified Apple Crisp

Image from Minimalist Baker 

Garlic:

We love it for it’s great taste and here’s why we love it even more. We said love since it’s great for protecting your heart to fight against potential diseases and improves your heart/ cardiovascular health.

Garlic Recipe:

Cilantro-Lime-Garlic Cashew Cream from Oh She Glows

Cilantro-Lime-Garlic Cashew Cream

Image from Oh She Glows

Ginger:

Known for it’s little bit of kick, ginger is an ideal spice for when you to speed up the healing of a cold and to combat nausea. It’s also an amazing natural way to beat heartburn by clearing your stomach quicker and reducing inflammation.

Ginger Recipe:

Vegan Gingerbread Trifle from hot for food

Vegan Gingerbread Trifle

Image from hot for food 

Turmeric:

Bright just like it’s benefits, turmeric if filled with power. It’s well known for it’s anti-inflammatory properties that helps decrease pain that comes from inflammation in various parts of your body and helps soothe discomfort.

Turmeric Recipe:

Coconut Brown Rice from Living Lou

Coconut Brown Rice

Image from Living Lou

Being vegan doesn’t mean that we have to sacrifice the delish factor of chocolaty goodness. As more people choose the plant-based route, the amount of recipes we have available to us is flourishing. Whether you’re making a dessert for your yourself, partner, BFF or family these recipes created by some incredible Canadians are promised to please even the non-vegans in your life.


Chocolate Espresso Mug Cake from The Cheeky Chickpea

This super simple four-step mug cake is ready in under five minutes making it the perfect dish for a time crunch or if you don’t have a huge kitchen space. You can add a thoughtful touch by putting them into mugs that match their personality.

Image from The Cheeky Chickpea Instagram

Ingredients:

  • 3 tablespoons all purpose flour (can substitute for gluten free flour)
  • 3 tablespoons cocoa powder
  • 3 tablespoons brown sugar
  • 1/2 teaspoon espresso powder (instant coffee granules), regular or decaffeinated
  • 1/4 teaspoon baking powder
  • 1/81/4 teaspoon salt (a pinch)
  • 2 tablespoons dairy free chocolate chips (plus more for serving)
  • 1/3 cup cold water
  • 1 tablespoon oil, recipe uses grape seed oil
  • 1/2 teaspoon vanilla

Instructions:

  1. Add the dry ingredients: flour, cocoa powder, salt, instant coffee granules, sugar, baking powder, to a microwavable coffee mug (must hold at least 1 and 1/2 cups of liquid) and stir with a small whisk or a spoon.
  2. Pour in the wet ingredients: water, oil, vanilla. Mix the batter until smooth. Stir in 1 tablespoon of chocolate chips. Sprinkle the other tablespoon of chocolate chips on top.
  3. Cook in the microwave for 60 seconds (recipe at 1100 watts).
  4. Sprinkle with a few more chocolate chips. Grab a spoon and dig in! Add a small scoop of vegan vanilla ice cream if you like.

Chocolate Zucchini Bread from This Healthy Kitchen

Get your vegetables in while you eat dessert with this healthy chocolate bread. With a gluten free option for extra versatility, it’s an amazing option for the person in your life who is looking for a satisfying treat with benefits.

Image from This Healthy Kitchen Instagram 

Ingredients:

Dry:

  • 2 cups oat flour, gluten free if preferred
  • 1/3 cup raw cocoa powder
  • 2 tsp baking powder
  • 1 tsp baking soda
  • 1/4 tsp sea salt

Wet:

  • 1 cup pitted dates
  • 1/4 cup water
  • 1 tbsp pure vanilla extract
  • 2 cups shredded zucchini approx 1 large or 2 small zucchini
  • 1 1/4 cup unsweetened cashew milk or almond milk or soy milk if avoiding nuts
  • 1/3 cup dark chocolate chips plus more for sprinkling on top if desired

Instructions:

  1. Preheat the oven to 350 degrees F, and line a 9″x5″ loaf pan with parchment paper.
  2. Whisk all the dry ingredients into a large bowl and set aside.
  3. Add the dates and water to a food processor and pulse until a paste is formed, scraping down the sides as needed. Transfer this mixture to a medium bowl. Then add all remaining wet ingredients to the same bowl and mix to combine.
  4. Pour the wet mixture into the dry ingredients and mix until combined. Then pour the batter into your prepared loaf pan. Sprinkle with additional chocolate chips if desired and gently press them down.
  5. Bake for 50-60 minutes, until a toothpick comes out mostly clean. Then remove from the oven and let cool for at least 10 minutes before carefully transferring to a wire rack to let cool completely before slicing. Enjoy!


Vegan Chocolate Pretzel Truffles from Running on Real Food

Get your sweet and salty cravings in bite sized delight with truffle that’s sweetened only by dates and chocolate with a nice salty texture from the pretzels. They make the perfect dessert to snack on wether you’re watching a movie or out on the terrace.

Image from Running on Real Food Instagram

Ingredients:

  • 1.5 cups packed, soft pitted dates
  • 4 tbsp cocoa powder
  • 1/2 cup chopped walnuts or walnut pieces
  • 1/2 tsp sea salt
  • 6–8 pretzels, crushed, or more as needed
  • 1/2 cup finely chopped dairy-free chocolate chips


Instructions:

  1. Place the medjool dates in a food processor with the cocoa, sea salt and walnuts and mix until it forms a thick dough (I like to pulse a few pretzels to the truffle mixture too!). Roll into 16 balls and place on a parchment or wax paper-lined baking tray that will fit in your fridge or freezer. Place in the freezer while you prepare the chocolate and pretzels.
  2. Crush the pretzels in a bowl with the bottom of a small dish or measuring cup.
  3. Place the chocolate in a bowl and melt in the microwave or melt using a double boiler, then roll each truffle in the melted chocolate until coated and place back on the baking sheet. Sprinkle generously with crushed pretzels. 
  4. Place the baking sheet in the fridge or freezer until the chocolate has hardened.
  5. Enjoy! Store in the fridge or freezer. They’ll keep in the fridge for up to 2 weeks and freezer for up to 2 months.


One Bowl Jumbo Chocolate Chunk Cookies (vegan + gf) from Oh She Glows

We’d like to introduce you to the crunchy on the outside and soft on the inside, with melted chocolate you’ve been looking for, while being gluten free and vegan. Not to mention you only need one bowl during the whole baking process to make it easy to clean and reduce water waste.

Image from Oh She Glows Instagram 

Wet Ingredients:

  • 1/2 cup (120 g) natural smooth almond butter (It’s important to use natural smooth almond butter that has a fairly “drippy” consistency. Be sure to stir it very well before measuring and avoid using the dry/hard nut butter at the bottom of the jar as it’s too difficult to mix with the other wet ingredients).
  • 1/4 cup plus 3 tablespoons (105 mL) pure maple syrup
  • 3 tablespoons (45 mL) virgin coconut oil, softened but not hot**
  • 1/2 teaspoon pure vanilla extract

Dry Ingredients:

  • 1/2 cup (50 g) gluten-free rolled oats
  • 1/4 cup plus 2 tablespoons (50 g) gluten-free oat flour
  • 1/4 cup (33 g) arrowroot flour/starch
  • 1/4 cup (25 g) almond flour
  • 1/2 teaspoon baking soda
  • 1/2 teaspoon pink Himalayan salt
  • (150g) 55% non-dairy dark chocolate (about 1 1/2 bars)***


Instructions:

  1. Preheat the oven to 350°F (180°C) and line a very large (approx. 21 by 15 inch) baking sheet with parchment paper.
  2. In a large bowl, stir together the wet ingredients (almond butter, maple syrup, oil, and vanilla) until completely smooth.
  3. Stir the dry ingredients (oats, oat flour, arrowroot, almond flour, baking soda, and salt) into the wet mixture, one by one, until thoroughly combined. The dough will be a bit wet/oily, but this is normal.
  4. Chop the chocolate into small chunks. Set aside 3 tablespoons (for topping the cookie dough later), and stir the rest of the chocolate into the batter until combined.
  5. Using a large retractable cookie scoop (or simply a spoon and your hands), scoop mounds of dough (about 2 1/2 tablespoons of dough per cookie). Add each onto the baking sheet, about 3 inches apart, as they’ll spread a lot while baking.
  6. Press the remaining 3 tablespoons of chocolate onto the tops of the cookie dough mounds, evenly distributed. (Reshape the cookie dough mounds if they flatten a bit.)
  7. Bake for 8 to 10 minutes (I prefer 8 1/2 to 9 minutes for gooey and soft cookies), until the cookies are spread out. If you prefer a crispy cookie, bake for about 12 minutes.
  8. Cool the cookies directly on the baking sheet for about 5 to 6 minutes. The cookies will be super delicate until they are cooled. Using a spatula, gently transfer each cookie directly onto a cooling rack for another 10 minutes, where they’ll firm up even more. (It’s normal to have a small amount of oil on the bottom of the cookies due to the almond butter. If this bothers you, simply place them on a couple sheets of paper towel.) Serve and enjoy! Allow the cookies to cool completely before storing. (These cookies spread out a lot and are fairly thin. If you prefer a thicker cookie you can try chilling the dough before baking.)

Vegan Double Chocolate Donuts from It Doesn’t Taste Like Chicken

Donuts are undeniably delicious and when you make them from scratch it ads that extra touch of love to anyone eating it. There’s the option to customize your toppings depending on what you’re in the mood for.

Image from It Doesn’t Taste Like Chicken Instagram

Dry Ingredients:
  • 3/4 cup all-purpose flour
  • 1/3 cup cocoa powder
  • 3/4 teaspoon espresso powder (optional for a flavour boost, if you don’t have it on hand or would prefer the donuts without, feel free to skip it.)
  • 1 teaspoon baking powder
  • 1/4 teaspoon baking soda
Wet Ingredients:
  • 2/3 cup non-dairy milk (such as soy or almond)
  • 1/3 cup brown sugar
  • 3 tablespoons vegan butter, melted
  • 1 teaspoon apple cider vinegar or lemon juice
Chocolate Glaze Ingredients:
  • 1 cup powdered sugar
  • 3 tablespoons cocoa powder
  • 2 tablespoons non-dairy milk (such as soy or almond), more if needed
  • 1/4 teaspoon espresso powder (optional for a flavour boost)
  • sprinkles or chopped nuts for garnish (optional)
Donuts Instructions:
  1. Preheat your oven to 350F (180C). Lightly grease a donut baking pan.

  2. In a large bowl, whisk together all the dry ingredients. In a medium bowl mix together all the wet ingredients. Now add the wet ingredients into the dry ingredients and stir until just combined. Do not over mix, lumps are totally cool.

  3. Scoop the batter into a large ziplock bag and cut the corner off of the bag. Alternatively, use a pastry bag. Pipe the batter into the donut pan, dividing it evenly among the 6 donut wells. Bake for 12 to 16 minutes until the donuts have puffed up and a toothpick inserted to the center comes out clean. Cool for 5 minutes before transferring to a cooling rack

Chocolate Glaze Instructions:
  1. Add all of the ingredients to a bowl and mix well. If the glaze is a bit too thick add 1 teaspoon non-dairy milk at a time to reach desired consistency.

  2. Dip the donuts into the glaze half way up and carefully lift the donut back out again. Then dip the freshly glazed donut into a small plate of sprinkles or chopped nuts if desired. The frosting will set as the donut rests. Donuts are best enjoyed the same day they are made but once cooled can be stored in an air-tight container at room temperature for 2 -3 days.

With the holidays right around the corner, we all tend to indulge in the vast array of goodies before us. And of course we should! ‘Tis the season to celebrate the joys of life. That said, sometimes our bodies end up letting us know that digestion issues could get in the way of our merry times via breakouts (especially in the chin area), heartburn and gas. In addition to certain foods in our diet that make an extra appearance during the season such as goodies that are spicy or contain sugar and caffeine, our digestion can be affected by a number of different things such as:

  • Stress
  • Lack of sleep
  • Dehydration 
  • Not enough exercise

But with some simple lifestyle adjustments, we can get our systems back to proper flow in no time. To get you started, we’ve put together a list of the top 5 food and drinks,with recipies, to help your gut get going. 
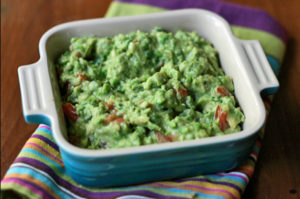
 

1. LEAFY GREENS:

Things like spring mixes, kale and spinach is a staple for a healthy digestive tract. A diet filled with dark leafy greens that not only contains ample amounts of vitamins but a lot of fiber that works quickly to clear out your system. 

Recipe | Vitamin Glow Warm Squash Salad from Oh She Glows

Image from Oh She Glows website

Ingredients:

For the butternut squash:

  • 1 medium butternut squash
  • 1 tablespoon (15 mL) oil of choice
  • Fine sea salt

For the Garlic-Dijon Vinaigrette:

  • 1 small (3 g) garlic clove
  • 1/4 cup (60 mL) apple cider vinegar
  • 1/4 cup (60 mL) grapeseed oil (or other light-tasting oil)
  • 2 teaspoons (10 mL) fresh lemon juice
  • 2 teaspoons (10 mL) Dijon mustard
  • Fine sea salt, to taste
  • Freshly ground black pepper, to taste
  • 1 tablespoon (15 mL) pure maple syrup, or to taste

For the salad:

  • 1 (5-ounce/142 g) package baby romaine or mixed greens
  • 1 large (270 g) avocado, pitted and sliced
  • Heaping 1/2 cup (65 g) chopped walnuts*
  • 2 tablespoons (18 g) hemp hearts
  • Salt, pepper, and garlic powder, for garnish

Directions:

  1. For the butternut squash: Preheat the oven to 400°F (200°C), and line a large baking sheet with parchment paper. Peel, halve, and seed the squash. Slice the squash into 1/2-inch wedges. Transfer to the baking sheet and toss with the tablespoon of oil. Spread the squash into an even layer and season generously with salt. Roast for 30 to 40 minutes, flipping once halfway through until the squash is fork tender and lightly browned. 
  2. Meanwhile, prepare the Garlic-Dijon Vinaigrette: Finely grate or mince the garlic and place it into a small glass jar. Add the vinegar, oil, lemon juice, Dijon, salt, pepper, and maple syrup. Secure the lid and shake vigorously until combined. Taste the dressing and adjust the oil, salt, and maple syrup, if desired. You can also make the dressing in a blender or food processor, if you’d prefer.
  3. When the squash is nearly finished roasting, begin building your salad bowls: Portion 2 to 3 handfuls of the baby romaine/mixed greens into four large shallow bowls. Drizzle a tablespoon of dressing over each bowl and toss until the greens are fully coated. 
  4. Divide the sliced avocado, walnuts, and hemp hearts into four portions, and evenly distribute on top of each bowl. 
  5. When the squash is finished roasting, transfer several wedges directly from the pan to the top of each bowl. Finish each salad with a sprinkle of salt, pepper, and garlic powder, as well as a final drizzle of dressing. Serve immediately. 

Nutrition Information

Tips:

  • Feel free to use toasted walnuts, if you prefer, but rest assured that raw work wonderfully too!
  • You can absolutely make this salad for a single portion too! To build just one salad, I suggest portioning each ingredient as follows: approximately 2 handfuls of greens, 1/4 of a large avocado (sliced), 3/4 cup warm roasted squash, 1 to 2 tablespoons vinaigrette (to taste), 2 heaping tablespoons of chopped walnuts, and 1/2 tablespoon of hemp hearts.
  • Any leftover squash can be easily reheated over the next few days. Here is how I like to warm up leftover roasted squash: Coat a large skillet with oil and add your leftover cooked squash with a pinch of salt. Sauté over medium-high heat for about 5 minutes, until warmed through.
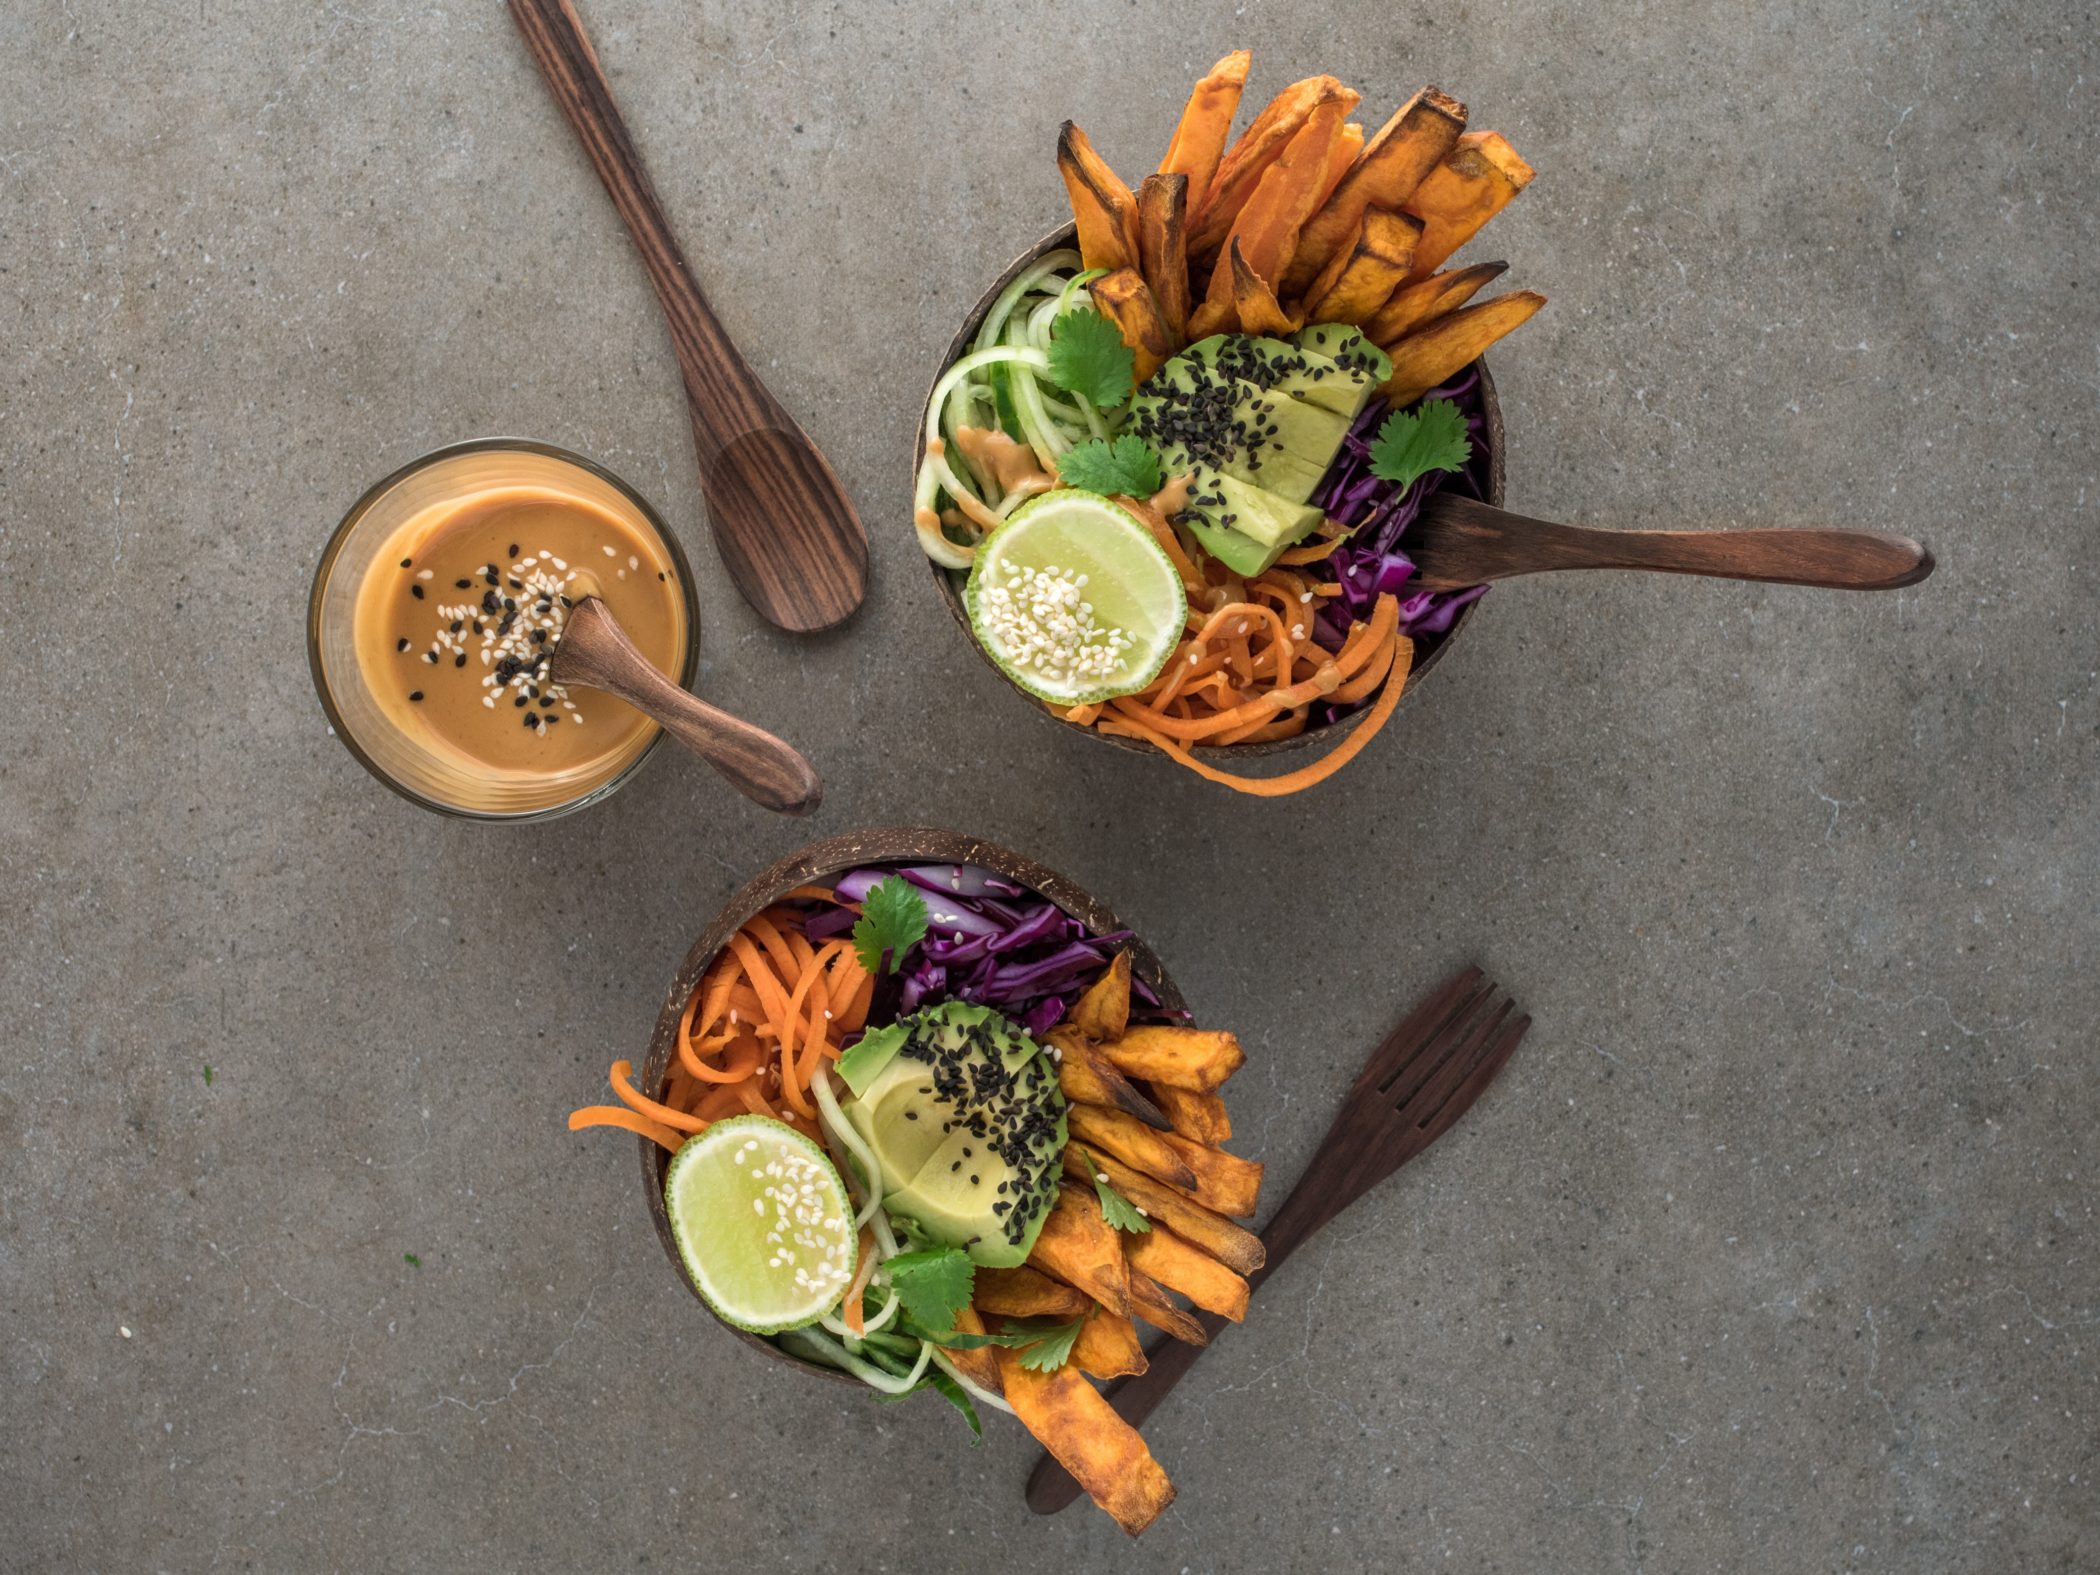
 

2. BROWN RICE:

As an insoluble fiber, the chances of constipation are lowered as it helps move things through your digestive system easily. It’s also a gluten-free whole grain which makes it a fiber rich superfood perfect for all diets.

Recipe | Stir-Fried Chickpeas and Asparagus with Brown Rice and Lemon Tahini Dressing from Dinner With Julie 

Image from Dinner with Julie website

Ingredients:

  •       a drizzle of canola or olive oil
  •       1 19 oz. (540 mL) can chickpeas, drained well
  •       2 garlic cloves, crushed
  •       1 onion, chopped
  •       1/2 bunch asparagus, cut into 1″ pieces
  •       2-3 cups precooked brown rice (cold rice fries up better, with separate grains instead of turning pasty)
  •       1/2 cup sliced or slivered almonds, toasted
  •       TAHINI DRESSING
  •       1/4 cup tahini
  •       juice of 1 lemon (or 2-3 tablespoons)
  •       2 Tbsp. extra-virgin olive oil
  •       2 Tbsp. hot water
  •       1 garlic clove, finely crushed
  •       pinch salt

 Direction:

  • To make the dressing, shake everything up in a jar. Depending on how much you like, you may have enough for a second batch of chickpeas with asparagus.
  • Heat a generous drizzle of oil in a skillet set over medium-high heat; add the chickpeas and cook for a few minutes, until they start turning golden. They will sputter and pop as they cook. Add the garlic and a bit of salt and cook until they are nicely golden and getting crispy. Transfer to a shallow bowl.
  • Add the onions to the pan, along with a little more oil if you need it. Cook for 4-5 minutes, until golden. Add the asparagus to the pan and cook for a minute or two, putting the lid on the pan if it helps, just to allow the asparagus to brighten and soften a bit. Dump that into the bowl with the chickpeas.
  • Add another slick of oil to the skillet and cook the rice for a few minutes, just to warm it through and brown it a bit as well. Add the chickpeas, onions and asparagus back to the pan and toss it around to warm it all through, then divvy it among bowls and sprinkle with almonds. Drizzle with a bit of the tahini dressing and pass more at the table.
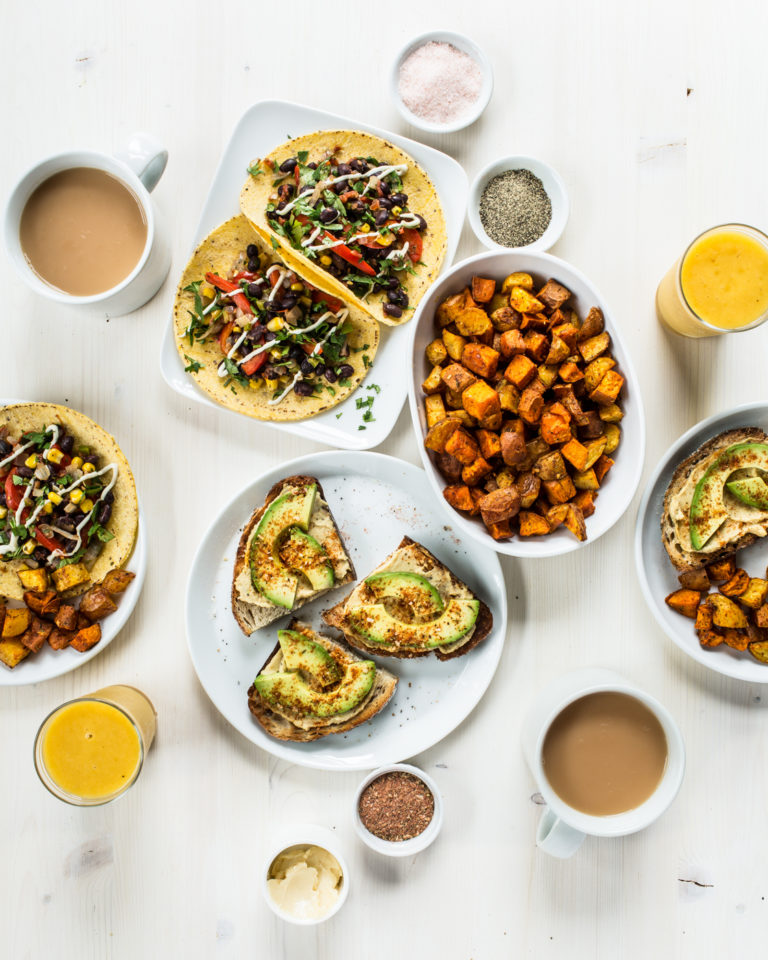
 

3. FLAX SEEDS:

Healthy fats, including these guys are imperial for your digestion to keep your track lubricated and running smoothly from its oil content. They’re super easy to add into smoothies and salads making it an ideal way to get your fiber in. 

Recipe | Flax Seed Dutch Oven Crusty Bread from Bluebird Kisses 

Image from Bluebirds Kisses website

Ingredients

  • 1.5 cups whole wheat flour
  • 1/3 cup ground flax seed
  • 1/2 cup flax seeds
  • 1/2 cup sunflower seeds
  • 1/2 cup pumpkin seeds
  • 1/2 cup chia seeds
  • 2 tsp salt
  • 2 tsp instant (quick rising yeast)
  • 1.5 cups warm water 

Directions:

  • Put all the dry ingredients and seeds in a large bowl and mix well. Add water and mix with your hands until incorporated, if some sticks to your hands that’s ok just do your best to scrape it off. Cover the bowl with plastic wrap and set aside on the counter for 2.5 hours.
  • At the 2.5 hour mark, preheat the oven with your dutch oven inside at 400 degrees F. Once preheated take the dutch oven out with gloves, and remove its lid. uncover the bowl, sprinkle a bit of flour on tops of the dough and pull it out. Pat the dough with a bit more flour if its super sticky, you should be able to shape it into a round loaf shape, then drop it into the hot dutch oven. Cover and put back in your oven for 30min. At 30min, take the lid off the dutch oven and bake another 10-15min, checking at the 6 min mark to make sure the top browns but not burns. It’s done when the crust is hard and brownish.
  • Serve hot, or cold toasted. Either way it’s so good and so hearty and full of fibre! 


4.KOMBUCHA: 

This baby is filled with probiotics, the ultimate gut suporter that creates a protective coating on your stomach lining. It’s filled with good bacteria that helps to filter out all of the gunk that might get trapped in there when we’re backed up. 

Recipe | Quick And Easy Guide For Brewing Kombucha from Meghan Telpner

Image from Meghan Telpner website

The Tools You’ll Need

  • 1 gallon glass jar (holds about 3-4 litres)
  • 1 cup measure
  • 1 pot
  • Wooden spoon
  • Cheesecloth
  • Rubber band

Ingredients

  • 1 gallon of clean water (preferably not straight from your tap)
  • 1 cup organic white sugar
  • 8 organic caffeinated tea bags (I recommend an organic Earl Grey)
  • ½ cup kombucha (optional*)
  • 1 SCOBY (get one online, at your local health food store or from a health loving friend!)

Directions

  1. Fill your gallon jug with water and then pour that into your pot. (This is an easy way to measure the volume you need.)
  2. Bring water to a boil and remove from heat. Add sugar and tea. Stir and allow to steep with the lid off. You want your water to cool to room temperature.
  3. Once water has cooled to where you can stick your finger in and it’s neither too hot nor too cold, transfer it to your clean gallon jar. Stir in the ½ cup of kombucha*. Use your wooden spoon to add your SCOBY.
  4. Cover with cheesecloth and secure with a rubber band. Keep in a slightly warm spot, like beside your oven or on top of your fridge. By the window in the winter would be a bad idea as the cooler the area, the longer it will take to ferment.
  5. Be patient. Let sit for 2-4 weeks. Start tasting it after two weeks and then every few days until it’s to your desired taste.
  6. *If you don’t have a ½ cup of kombucha, it’s okay. This simply acts as a starter. It just might mean your kombucha will take a little longer to ferment.

Notes

  •       I personally like to leave my kombucha for about four weeks. I want that sugar digested fully by the SCOBY so my brews are fairly strong and not that sweet. Usually ¼ cup is all I can sip on at one time. This is truly healing kombucha.
  •       If you like your kombucha sweeter, that’s cool too. Just know that when you’re buying the store-bought kind, if it tastes super sweet, that’s because it is. I’d recommend fermenting until it’s no longer sweet and than sweetening as you like, for example, by squeezing in a little fresh orange or blueberry juice.

Additional Notes

  •       You can add flavoured tea bags to your brew by using 4-6 black tea bags and then adding, say, 2-4 peppermint or ginger tea bags.
  •       It’s best to keep your SCOBY away from direct contact with metal. I don’t know why, but I remember someone telling me this.
  •       It’s best to use a plain organic white sugar. It’s the sugar the SCOBY wants, so adding a whole coconut sugar or sucanut can interfere with the process. Once you’ve done it a few times with organic sugar, I invite you to play with other sweeteners. Let me know how it goes!
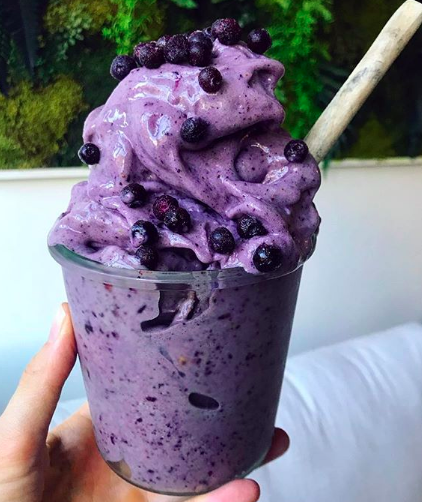
5.ORANGES: 

These guys are super high in fiber especially the white stuff that we normally pick out. Oranges also help lower your cholesterol which helps with digestion while keeping your bowels hydrated from their juice. 

 Recipe | Healthy Orange Julius from Jillian Harris 

Image from Jillian Harris website

Ingredients:

  • 1 c. almond milk
  • 1 ¼ c. fresh-squeezed orange juice
  • 2 ½  tsp vanilla
  • 2 packets (2 tsp) Stevia
  • 1 ½ c. ice cubes (about 9 cubes)
  • 1 tbsp. hemp hearts (optional)
  • 1 tsp. maca powder (optional)

Directions:

1. Add all ingredients to your blender and combine until smooth. Garnish with an orange wedge.

Summer isn’t over yet and neither are the celebrations. There’s still plenty of time and good weather left to get together, reflect on the good times and make new memories. We’ve compiled some of our favourite vegan appetizers, so we’ve put together a list of vegan apps for the perfect August patio party from some of our favourite plant-based sites.

Superfood Crunch Salad with Homemade Balsamic Apple Vinaigrette by Oh She Glows

Superfood Crunch Salad with Homemade Balsamic Apple Vinaigrette

Ingredients

Dressing:

  • 2 tablespoons extra virgin olive oil
  • 1 tablespoon apple cider vinegar
  • 1 tablespoon balsamic vinegar
  • 1 teaspoon pure maple syrup, or to taste
  • 1 teaspoon Dijon mustard
  • 1 garlic clove, minced
  • 1/4 teaspoon fine grain sea salt
  • Freshly ground black pepper, to taste

Salad:

  • 8-10 cups destemmed and shredded Lacinato (dino) kale (2 bunches)
  • 1 pear, thinly sliced and chopped
  • 1/2 cup pomegranate arils
  • 1/4 cup pepita seeds
  • 3-4 tbsp large flake coconut
  • 1-2 tbsp hemp hearts
  • 1-2 teaspoons black sesame seeds (optional)
  • sprinkle of cinnamon

Directions

  1. In a medium bowl, whisk together the dressing ingredients. Adjust to taste if desired.
  2. Remove all of the stems from the kale leaves and compost the stems (or if you are hard core you can save them for smoothies). Finely chop the kale leaves into tiny “shredded” pieces. The smaller the more tender the leaves will feel. Wash and spin dry. Place kale into a large salad bowl. You should have about 8-10 cups of kale for this salad.
  3. Toss the kale in all of the dressing until everything is coated nicely. The kale will reduce in volume substantially.
  4. Add the toppings (as much as you want – I recommend lots!), sprinkle with cinnamon, and serve immediately. Or let the dressing marinate the kale for a half hour or so. This salad is best served fresh, but it will keep chilled in the fridge for a day. if you don’t think you will eat that quickly, I recommend making a half batch at a time or simply store the kale and dressing separately until ready to mix and consume.

Vegan Cheeseburger Pasta Salad by hot for food

Vegan Cheeseburger Pasta Salad

Ingredients

Pasta Salad

  • approx. 3 (280 g) small pasta shells
  • 2 tbsp vegetable oil
  • 2 C veggie ground round, such as frozen Gardein beefless ground round
  • 1 1/4 C white onion, finely diced, divided (¼ C diced, as raw garnish)
  • 1 tsp granulated garlic powder
  • 1 tsp sea salt
  • 1/2 tsp ground black pepper
  • 1 1/2 C cherry tomatoes, quartered
  • 3/4 C cubed vegan cheddar cheese, from a block or slices stuck together
  • 1 1/4 C garlic dill pickles, finely diced, divided (1/4 C diced as garnish)
  • 1/4 C + 2 tbsp chives, finely diced, divided (2 tbsp as garnish)
  • 3 C iceberg lettuce, shredded
  • 1 tsp smoked paprika (as garnish)
  • fresh ground black pepper (as garnish)

Thousand Island Dressing

  • 1 C vegan mayonnaise
  • 1/4 C green relish
  • 2 tbsp ketchup
  • 1 tbsp apple cider vinegar
  • 1 tbsp sambal oelek (chile paste), or hot sauce
  • 2 tbsp pickle brine
  • 1 tsp onion powder
  • 2 tbsp chives, finely chopped
  • ¼ tsp sea salt
  • ¼ tsp ground black pepper

Directions

  1. In a cast iron pan over medium-high heat, add vegetable oil, veggie ground round, 1 cup of white onion, granulated garlic powder, sea salt and ground black pepper. Cook for 10 to 12 minutes, stirring every so often until the ground round is golden and the onion is soft. Set aside.

  2. Add dried pasta shells to a pot of salted boiling water and boil for 7 to 8 minutes until cooked al dente. Drain but do not rinse.
  3. To make the dressing, combine vegan mayonnaise, green relish, ketchup, apple cider vinegar, sambal oelek, pickle brine, onion powder, chives, sea salt and ground pepper in a bowl. Set aside.
  4. In a large bowl add cherry tomatoes, vegan cheddar cheese, 1 cup diced garlic dill pickles, 1/4 cup chives, the cooked vegan ground round mixture and the cooked pasta. Pour 1 cup of dressing over top and toss to combine. Set aside to cool at room temperature for at least 30 minutes before topping with lettuce.

  5. Just before serving, top the cooled pasta with the shredded lettuce and the remaining 1/4 cup of white onion, the remaining ¼ cup of pickles and the remaining 2 tablespoons of chopped chives. Sprinkle with smoked paprika and freshly ground black pepper. Toss and serve with extra thousand island dressing on the side.

Berry Tarts With Hazelnut Banana Filling by This Rawsome Vegan Life

Berry Tarts With Hazelnut Banana Filling

Ingredients

Crust:

  • 3/4 cup dates
  • 1/4 cup raisins
  • ¼ cup almond flour
  • 1-2 tablespoons coconut oil
  • Pinch sea salt

Filling:

  • 2 bananas
  • 2 tablespoons hazelnut butter
  • ¼ teaspoon vanilla extract
  • Pinch sea saltTopping:
  • 1 cup fresh or frozen berries, or whatever fruit is in season near you
  • 3 tablespoons hazelnut butter
  • Coconut flakes, cacao nibs…

Directions

  1. Make the crust. Line three tart tins with coconut oil, parchment paper, or plastic wrap. Pit the dates, then throw the dates, raisins, coconut oil and sea salt in a food processor. Process until you have a sticky dough, it should end up forming into one ball in the food processor. Just be patient, it can take a few minutes. Add the almond flour. Mix it in until you have a thick, sticky dough. Press evenly into the three lined tart tins. If the dough is too sticky, wet your hands a little to make it easier to work with. Put the tart crusts in the freezer until they are hard enough to take out of their tins. This might take 30-60 minutes.
  2. Make the filling. Peel the bananas, then mash them together with the rest of the filling ingredients in a bowl with a fork. It should end up being like a hazelnut butter banana pudding. Spread into your crusts.
  3. Decorate. Top your tarts off with your berries, then drizzle on hazelnut butter. Add any other goodies you like. Enjoy right away. These are best fresh, but can be stored in the freezer for 1-3 days.

Tempeh Kebabs With Bell Peppers And Bok Choy from the pure life

Tempeh_Kebabs_Asian

Ingredients

  • 1 block organic tempeh
  • 1/4 cup tamari
  • 1 tbsp toasted sesame oil
  • 1 shake chilli flakes
  • 1 tbsp coconut sugar
  • 1 tbsp peanut butter
  • 1 yellow pepper
  • 1 green pepper
  • 1 red pepper
  • 1 head of bok choy
  • black pepper, sea salt and olive oil

Directions

  1. Chop up the tempeh into cubes.
  2. In a shallow bowl, add the tamari, sesame oil, chilli flakes, coconut sugar and peanut butter and mix well. Add the tempeh and let it marinate for at least 30 mins.
  3. Chop up the bell peppers and add the peppers & tempeh cubes along the skewers, alternating colours. Pour some olive oil on top of the skewers. Seperate the bok choy leaves and top with pepper, salt and sesame oil. Drizzle with olive oil. Put both foods on the BBQ.
  4. The tempeh should cook about 5-6 minutes each side until thoroughly cooked. Serve the kebabs and bok choy with some avocado or roasted BBQ potatoes for a little festive dinner!

Once summer kicks in, we’re always looking for new vegan snacks to satisfy our summer cravings, so we’ve rounded up these delicious and easy recipes from some of our favourite plant-based Canadian enthusiasts. Get ready to indulge in the deliciousness of natural ingredients that will leave your body feeling nourished and loved this summer!


Pea-camole by Simple Bites

This pea-camole is a great way to get your greens in without even realizing you’re eating them! Dip it with some carrots or other veggies for a crunch with benefits.

Ingredients: 

  • 1 cup shelled peas
  • 1 poblano pepper
  • 2 avocados
  • 1 tomato, diced
  • 1 lime
  • 1 clove garlic, diced
  • Salt

Instructions:

  1. Set a pot of water to boil and cook the peas until they are easily mashed with a fork. Drain, rinse with cold water, and set aside.
  2. Meanwhile, broil the poblano pepper until blistered, flipping over once. Remove the pepper to a plastic bag and seal – this will release steam and help loosen the skin from the pepper.
  3. Peel the avocado and scoop the flesh into a medium bowl. Mash with a fork until it is the consistency you desire. Halve the lime and squeeze out the juice over the avocado. Mash the peas and add them to the avocado.
  4. Remove the blackened skin from the pepper, remove the seeds, and dice. Add the pepper, tomato, and garlic to the bowl. Add salt to taste and serve.

Anna’s Healthy Faux-Nutella Spread by Bluebirdirdkisses

This faux-nutella is perfect for spreading, dipping, mixing or even eating with a spoon right from the container. Get your sweets and chocolate craving satisfied without tons of sugar!

Ingredients:

  • 2 cups raw hazelnuts
  • 1/4 cup raw cacao
  • 1/3 cup avocado oil
  • 1/3 unsweetened almond milk
  • 1/2 cup pure maple syrup
  • 2 tbsp pure vanilla extract

Directions:

  1. Preheat your oven to 400F.
  2. Roast your hazelnuts for approximately 7-8 minutes making sure to shake them mid roast.
  3. Let nuts completely cool. If you want to make your spread extra smooth you can remove the shells at this time…I leave mine on.
  4. In a food processor, process the hazelnuts for approximately 10 minutes, until smooth butter forms.
  5. Add the rest of the ingredients and process until smooth.
  6. Keeps in air tight container in the fridge for at least 1 week.

All-Dressed Kale Chips by Oh She Glows

Packed with flavour and vitamins, this snack is perfect for when you’re craving something salty and crunchy! Ditch deep fried and enjoy this baked kale goodness.

Ingredients:
(per baking sheet)

  • 1/2 bunch kale leaves
  • 1/2 tablespoon extra-virgin olive oil or melted coconut oil
  • 1.5 tablespoons nutritional yeast
  • 1 teaspoon garlic powder
  • 3/4 teaspoon chili powder
  • 1/2 teaspoon onion powder
  • 1/2 teaspoon smoked paprika
  • 1/4 teaspoon fine grain sea salt or pink Himalayan sea salt
  • 1/8 teaspoon cayenne pepper (optional)

Instructions:

  1. Preheat oven to 300F. Line a large rimmed baking sheet with parchment paper.
  2. Remove leaves from the stems of the kale and roughly tear it up into large pieces. Compost the stems (or freeze for smoothies). Wash and spin the leaves until thoroughly dry.
  3. Add kale leaves into a large bowl. Massage in the oil until all the nooks and crannies are coated in oil. Now sprinkle on the spices/seasonings and toss to combine.
  4. Spread out the kale onto the prepared baking sheet into a single layer, being sure not to overcrowd the kale.
  5. Bake for 10 minutes, rotate the pan, and bake for another 12-15 minutes more until the kale begins to firm up. The kale will look shrunken, but this is normal. I bake for 25 mins. total in my oven.
  6. Cool the kale on the sheet for 3 minutes before digging in! This really makes all the difference! Enjoy immediately as they lose their crispiness with time.
  7. Repeat this process for the other half of the bunch.

Lovers Chia Pudding Parfait by Jillian Harris

This deliciously filling delight is a great snack option if you’re in the mood for desert. So, treat yo self or spread the healthy snack love and make a few!

Ingredients:

Chia Pudding:

  • 2 1/2 cups plant-based milk of choice (I love coconut!)
  • 1/2 cup chia seeds
  • 3 tbsp maple syrup
  • 1 tsp vanilla extract
  • Pinch of sea salt

Pink “Soft Serve”:

  • 1 1/2 cups frozen strawberries
  • 1 1/2 cups sliced frozen bananas
  • 1 tsp vanilla extract
  • Pinch sea salt

For the Parfait:

  • 2 small jars
  • Sliced bananas, for layering
  • Frozen raspberries
  • Fresh flowers (optional – for the photo of course!)

Instructions:

Make the pudding:

  1. In a container, whisk together all chia pudding ingredients. Cover and chill overnight or for at least 3 hours until thick.

Make the soft serve:

  1. In the bowl of a large food processor, combine bananas, strawberries, vanilla, and sea salt. Blend until thick and creamy, about 2 minutes. Scrape the sides as needed.

Assemble your parfait:

  1. Start by adding your sliced bananas (if you have a small heart-shaped cookie cutter, cut your bananas into small hearts). Press the bananas firmly against the side of the jar in an upwards motion.
  2. Fill each jar about halfway with the chia pudding.
  3. Layer in your soft serve until it spills over the top.
  4. Add your raspberries and flowers and serve.
  5. Enjoy with someone you LOVE!!!!


5 Plant-Based Canadians To Check Out Now - Blog Image

Image By:
Alexandra Andersson
While there are so many amazing plant-based Instagrammers,  we wanted to the acknowledge a handful of home-grown Canadians that are making huge impacts in the vegan food scene.

Whether you’re starting your journey into the vegan space or simply looking for a few delicious recipes to help reduce your meat foot print while still being delicious, we recommend following these plant-based powerhouses ASAP.

Angela Liddon

Arguably the most widely recognized vegan in Canada, Angela Liddon, creator of the Oh She Glows blog, has amassed a following that steps well over the Canadian border, with a global following of over 600K on Instagram. The tone of Angela’s cookbooks and blog is extremely approachable, with an open and honest foreword about how she came into the vegan lifestyle and what inspired her journey to create easy-to-follow recipes that would please both vegans and meat-lovers alike. We also love the ingredients she uses can easily be found in Canada which is a huge win!

From Oh She Glows Instagram 


Lauren Toyota

We love Lauren Toyota’s approach to plant-based living. The woman is on a mission to make the vegan lifestyle mainstream, and encourages a joyful approach to the concept of consuming delicious plant-based meals with pleasure and fun. Coming from an entertainment background, Lauren’s YouTube channel is full of delicious recipes and great advice on plant-based life.

  From Lauren Toyota Instagram


Erin Ireland

Working as a food reporter, Erin discovered her passion and purpose; to raise awareness for plant-based eating, demonstrating how the lifestyle can be nutritious, delicious and always cruelty-free. We love her authentic voice and how she showcases the food she makes and eats through her iPhone, as opposed to highly glossed over professional photo shoots, showing us what recipes will actually look like (still amazing by the way!)

From Erin Ireland Instagram


Plant Based Toronto 

Although local to Toronto, the Plant Based Toronto blog offers a range of amazing recipes and tips on vegan living that are great for all Canadians like how to get started on your new vegan journey, and our favourite, a 101 on Nutritional Yeast.

From Plant Based Instagram 

Steph Yu

Like Angela Liddon, Steph came to veganism as a step towards recovery from an eating disorder. Her spiritual take on the plant-based lifestyle is truly inspiring, and well followed by 200K Instagram followers. Steph shares her experiences on her YouTube channel and as a plant-loving podcaster

From Steph Yu Instagram


Who do you love to follow for plant-based inspo? Share with us on Facebook!